
Ask a Pro Photographer: How Do You Edit Underwater Photos?
Jay ClueLearn how to maximize your editing workflow with pro photographer Jay Clue.
When teaching photography editing workshops, I always begin by sharing some advice that helped me to improve my skill level. In my early days of learning photography, I would shoot to edit. Exposure is off? Colors look weird? Sharpness isn’t there? No worries, I’ll just fix it in Lightroom later. I made up for my lack of photography skills and technique by an overreliance on editing. Then one day, a wise and old-school photographer bestowed upon me his 10-minute rule that changed my perspective. If I need to spend more than 10 minutes editing a photo, he explained, there better be a very good reason for it. Any more than 10 minutes is time wasted, which could be better spent shooting more photos.
At its core, the 10-minute rule is less about being a fast editor and more about pushing yourself to perfect your craft in camera. I challenge each of you to set a timer at your next editing session and see how much time you spend on each photograph. By quantifying your editing time, you will quickly see why efficient workflows are so important in photography. If, for example, I need to deliver 300 high-quality, print-ready final images on a big commercial shoot, that would demand 50 additional hours of work if I spent 10 minutes editing each! If I instead focus my attention early in the workflow and get the shot near perfect in camera, I knock out editing all 300 images in closer to 8 hours and will have freed up almost a work week.
My editing workflow has changed drastically over the years and it continues to evolve as I encounter new or better ways to capture photos and edit more efficiently. Last month, Instagram user @morgan_media asked, “How do you edit? What’s your process?”
So, in this month’s Ask a Pro Photographer, I walk you through my step-by-step process from the final moment of shooting to the final moments of editing. Ready? Let’s dive in!
Data Management and Organization
Post-processing should always start by getting those precious photo files somewhere safe. There are many ways to do this, but I like to immediately back up my SD cards to a fast external solid-state hard drive (SSD) and then import the RAW files into Adobe Lightroom Classic. There are a few awesome library management apps out there, but I like having everything at my fingertips in Lightroom. Instead of importing every image, I quickly rip through all of them and cull everything that isn’t up to my base standard. Next, I keyword tag each photo to make finding them later more straightforward. Then I click import and while Lightroom gets to work, I usually walk away from the computer for a bit. I intentionally step away like this because I want to take a fresh look at the images for my next step.
Second Cull and Ratings
After the import is complete, I can run through the imported shots once more with fresh eyes. At this point, I will be more critical of my choices and give them a star rating from 1 (worst) to 5 (best). In my system, any photo under three stars will go immediately to the trash. Those with five stars are the best shots of the session, four stars are great and three stars are good or I think they might grow on me. Developing your own internal rating and keywording system helps you sort and find images with ease and efficiency. So when an editor asks me for an “epic tiger shark image”, I search for four- and five-star photos tagged with “tiger shark” and quickly have a robust selection to offer in just a few clicks.
Related Reading: Diving with—and Saving—North Carolina's Sand Tiger Sharks
Jay ClueBy utilizing presets from previous shoots we can speed up our editing workflows.
Beginning the Edit
To begin my edits, I filter my library to see only four- and five-star-rated images. I then pick one to work on that I consider “middle of the road”. In other words, the exposure and color of the shot should be a good average representation of this series of images. I first check if the exposure, water color and environment match any presets I’ve already created (more on this later). If, for example, I’m working on a shot from bright swimming pool-like turquoise waters, I will try one of my Bimini presets, but if it’s a blue water shot from miles offshore, I might grab a Baja preset. By using my own preset from a previous shoot, I quickly and efficiently apply settings that jumpstart my workflow with a solid starting point to start my manual edits.
But presets do not always look quite right—maybe the light or water color was different that day—no stress, we just rock it out manually. Easy peasy. Here’s how that process typically rolls for me.
Step One: Set a Profile
My go-to profile options are Adobe Neutral or Camera Neutral. These will make your shot look a bit flat and washed out, but this is a good thing–blockbuster films and documentaries are shot in neutral and flat profiles. They help to bring out the dynamic range in an image, meaning you can pull out a broader range of tones from the image. You will need to work a little extra to bring back the contrast, color and vibrance, but trust me, it’s worth it.
Step Two: Correct White Balance
After the profile is set, I crack into tweaking the temperature and tint—also known as the white balance. I’m a firm believer in correcting white balance in the camera (recall the 10-minute rule), so this step is usually pretty quick for me. The idea is to get the general color of the image close to real life, but it doesn’t need to be perfect, we will tweak the color a bit more later.
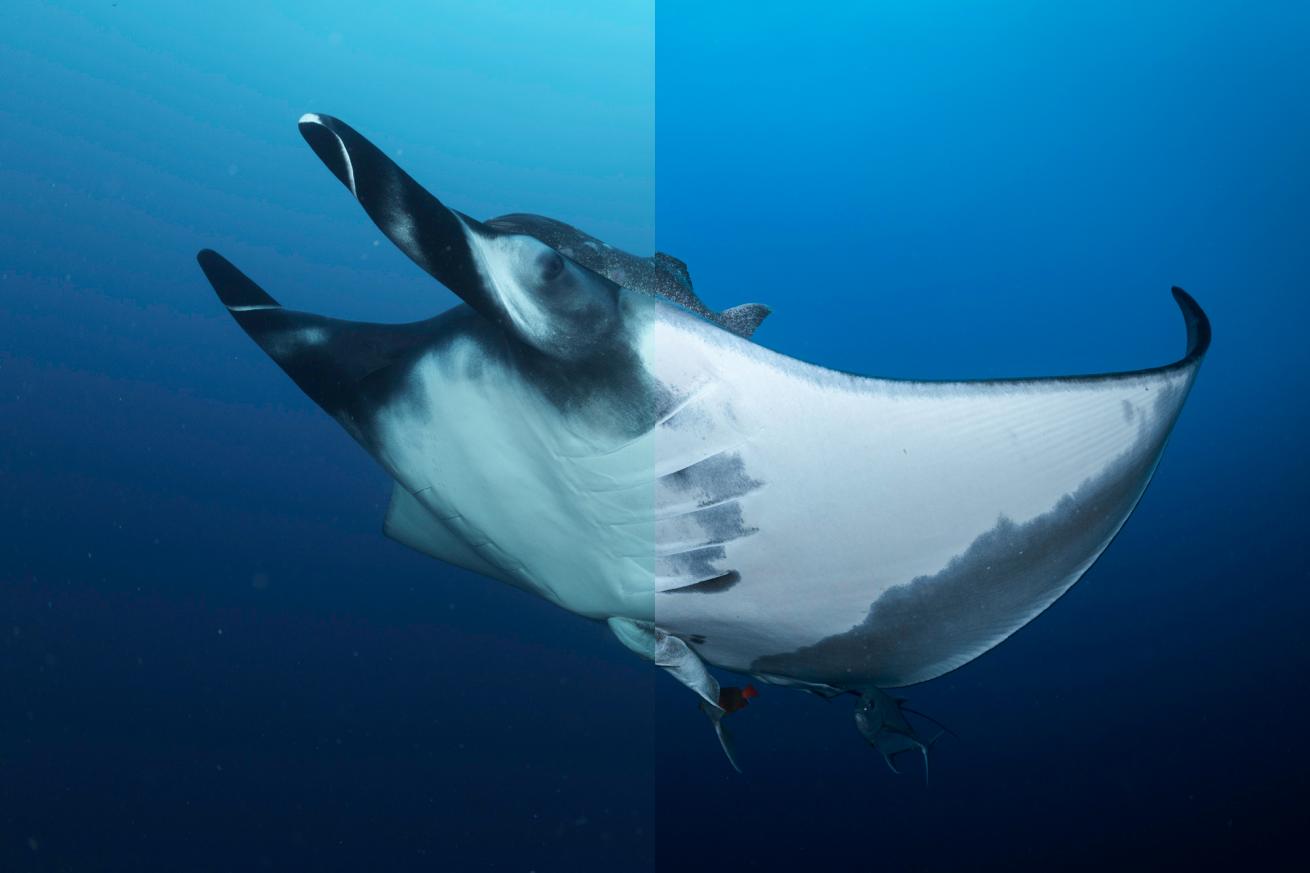
Jay ClueTweaking the temperature and tint of the image in Adobe Lightroom helps to correct the white balance and overall color of the shot.
Step Three: Correct Exposure
Now with my colors getting close to where I want them, I correct the exposure settings where needed (shadows, highlights, whites, blacks, overall).. I work the tone curve and might need to tweak the dehaze slightly in order to restore some contrast to the image.
Related Reading: How to Achieve Awesome Color in Your Underwater Photos
Step Four: Fine Tune Color
It’s time to fine tune our individual colors. I like to start with the HSL (hue, saturation, luminance) panel and then jump to the RGB calibration for additional refinements. Lastly, I add a tiny bit of color grading to the highs and lows to bring a little style and feeling to the image.
Step Five: Masking (If Needed)
At this point, I can usually see where masking might be beneficial. For example, I might use masking to make the subject pop from the background or to amplify the water column gradient. Avoid going overboard with masking, as it’s easy to make things look fake or over-edited. The shot most importantly needs to look and feel true to life.

Jay ClueThe inset image shows a subject mask being applied to the manta, which makes adjustments only to the manta (here, exposure and texture).
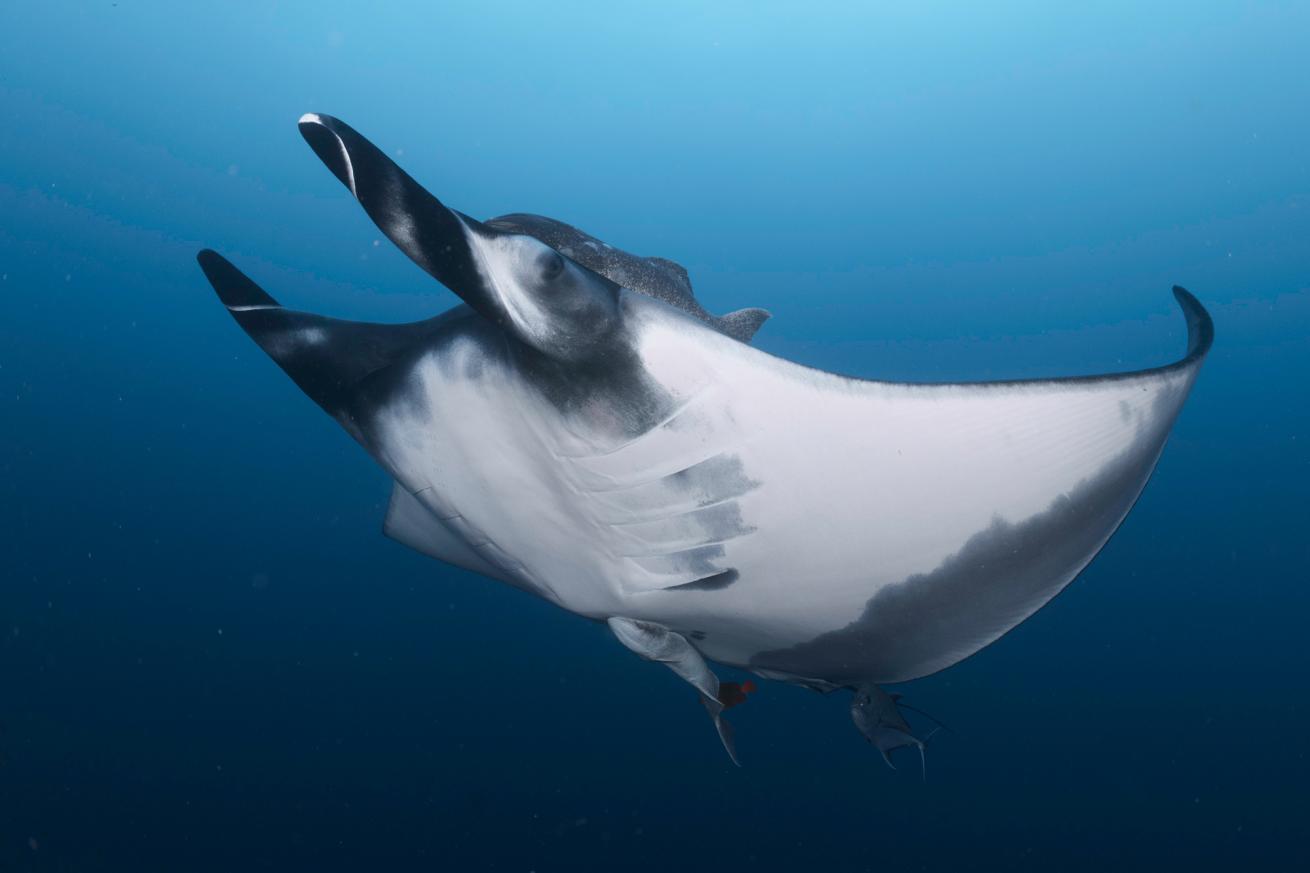
Step Six: Details
Now I focus on sharpening, texture and clarity to bring out (or diminish) the details of the image. I might also apply some Denoise at this stage to lower any noise in the shot. I might reserve clarity and texture for a mask if I want to only tweak the subject, but this depends on the type of shot and subject. For example, I don’t need the particulates in a deep blue ocean background to be extra crispy, but I really want that manta to be sharp. So I use a subject mask to apply detail settings only to the manta—such as clarity and texture.
Step Seven: Final Clean-up
I’ll do one last check to see if anything else needs to be tweaked a bit more or if I need to spot remove something like particulates floating in the water or stray bubbles. Then we are done!
Step Eight: Rinse, Wash and Repeat
Instead of doing this lengthy process on every image, we now select every photo in a specific session with similar light, color, etc. and equalize the exposure using Lightroom’s Match Total Exposures function. Then, I copy the settings from my original edited image and paste them to all the equalized photos. While there will inevitably be some minor tweaks afterward, this is a huge timesaver! Lastly, if I feel these settings could be beneficial for the future, I create a new preset from them that I can use in the future.
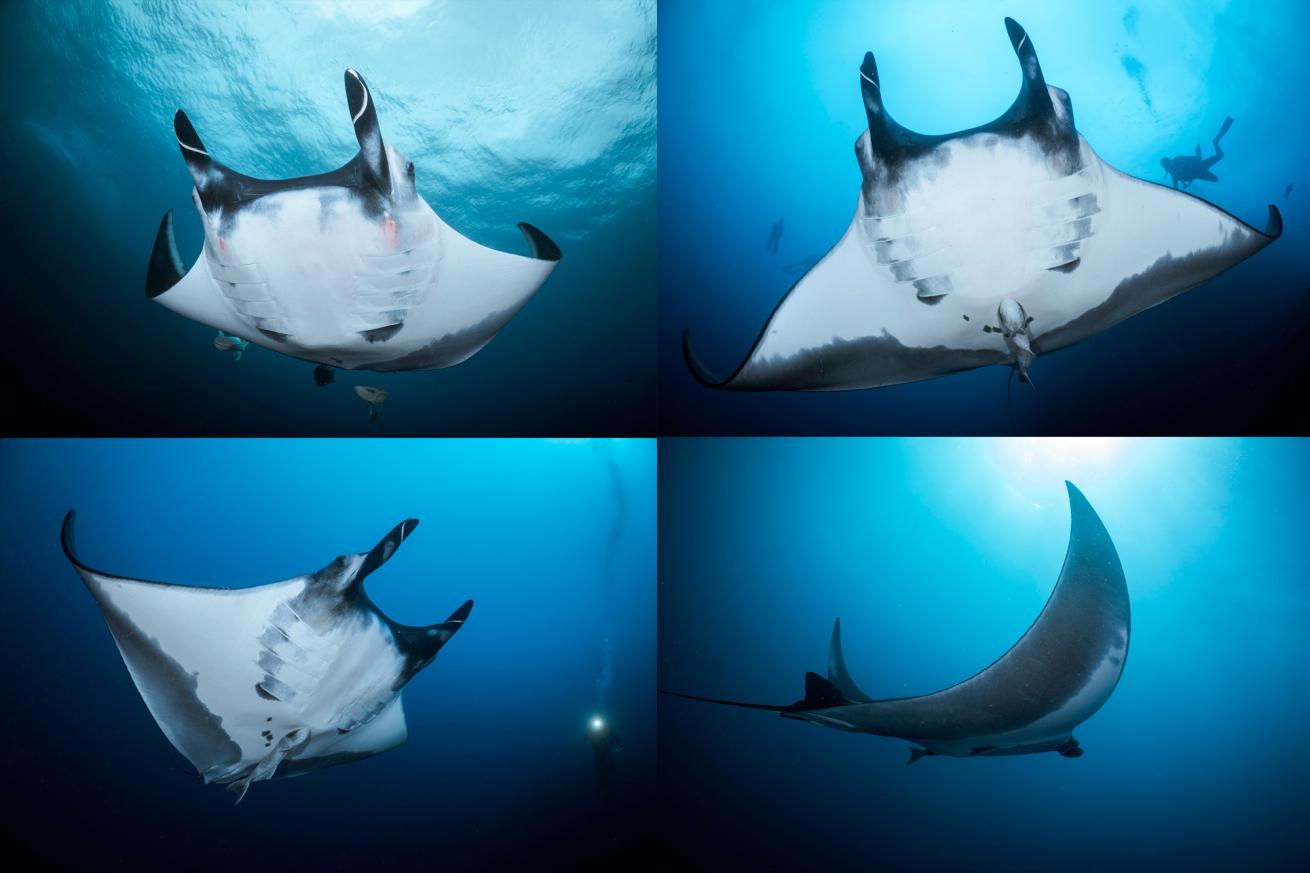
Jay ClueYou can save your photo settings as a preset and apply that preset to other images. All four images here use the same settings we created in this walkthrough with only minor tweaks made to each.
Related Reading: World's Best Destinations for Underwater Photography
Wrapping It Up
That wasn’t too hard, right? If you’re struggling with editing or want to jump forward quickly, I highly recommend booking a photography or editing workshop with a solid instructor. Spending one-on-one time with a Lightroom expert or an experienced photographer will help you jump leaps and bounds in your editing workflow. Big thanks to @morgan_media for submitting this month’s question. Don’t forget to check us out on the last Wednesday of every month on the @scubadivingmag Instagram to submit your questions. See you next month!
Ask a Pro Photographer is a monthly column where Jay Clue answers your questions about underwater photography, cinematography and conservation storytelling. Topics are chosen from our audience. If you have a question you’d like answered in a future Ask a Pro Photographer column, join us on Instagram at @scubadivingmag the last week of each month, or submit your questions using this form.
Cecilia Mar RuizJay Clue
Jay Clue is an accomplished photographer, educator and conservationist who uses captivating photography combined with passionate storytelling to inspire people around the world to cherish and preserve the natural beauty of our planet. His photos have appeared in a multitude of both print and digital media platforms, including Newsweek, National Geographic Traveller, Oceanographic Magazine and many more as well as for major brands such as PADI, Sony, National Oceanic and Atmospheric Association (NOAA) and more. When not working on commercial projects, he shares his passion for photography and conservation by teaching workshops and leading unforgettable experiences with wildlife around the world. Follow him at @jayclue on Facebook and Instagram, where he’s always happy to answer questions and chat about photography.