
Underwater Photos: 5 Ways to Photograph Wall Dives
Feeling weightless in the water and having the freedom to move in any direction are some of diving’s most addictive sensations. These feelings are most intense on vertical wall dives, especially when we take a few fin kicks out into the blue, turn around to face the wall, and feel our jaws drop when confronted by the spectacular 360-degree scenery. We want to record that awe in our photos, but we need tiptop technique to capture images that will do justice to such stunning tableaus.
Wide-angle scenic photography is one of the most challenging disciplines underwater; the secret is perfect balance. In terms of lighting, it’s all about balancing our light sources: the foreground lit with strobes, the background illuminated by available light. In terms of composition, it’s about searching for subjects near and far to achieve an image with depth and compositional balance.
When shooting walls, you must multitask, keeping several things in mind at once. Keeping the balance between your artistic desire to compose the scenery and the practical considerations of what your camera and lighting can capture technically makes those scenic shots much more attainable. With so much to consider, the best way to shoot walls is to build your images piece by piece: foreground, background, model, exposure, lighting and composition.
**Here are 5 tips to get the best underwater pictures from your next wall dive. **
**
**
**1. "Make instead of "take" your photos. **
In most languages, apart from English, you don’t take photographs, but rather make them. This verb choice seems particularly apt when it comes to describing wide-angle underwater images. Scenic pictures are widely considered trickier to master than macro because you must balance the foreground exposures provided by your strobes with the ambient light filling the scene’s background. Strobes must be carefully aimed to light your main subject and not the particles in the water. You also have to find a great subject, an attractive background, and possibly get your buddy to pose pleasingly — all at the same time. The secret is to deconstruct the process.
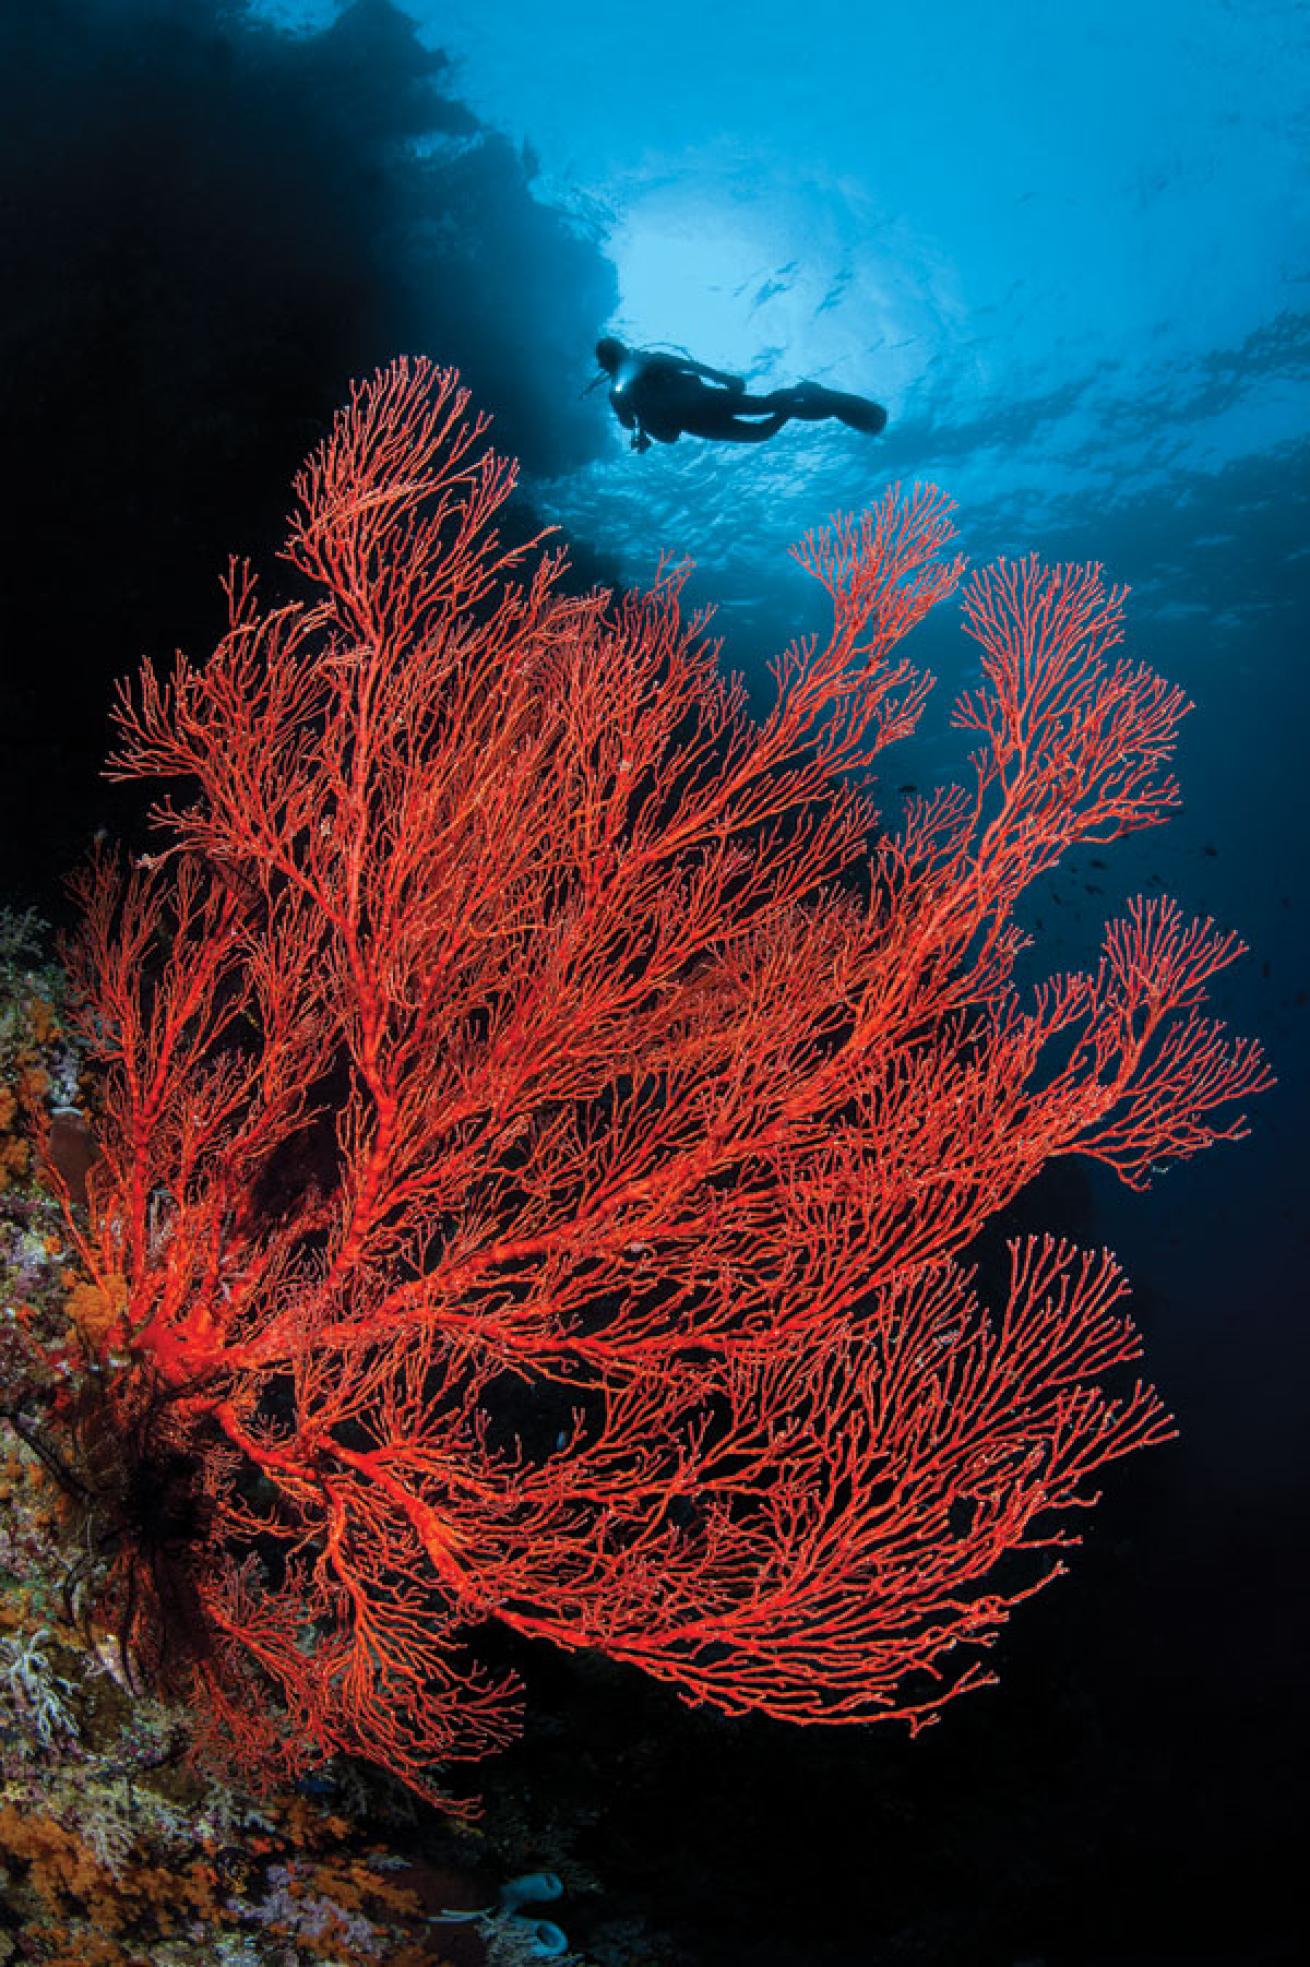
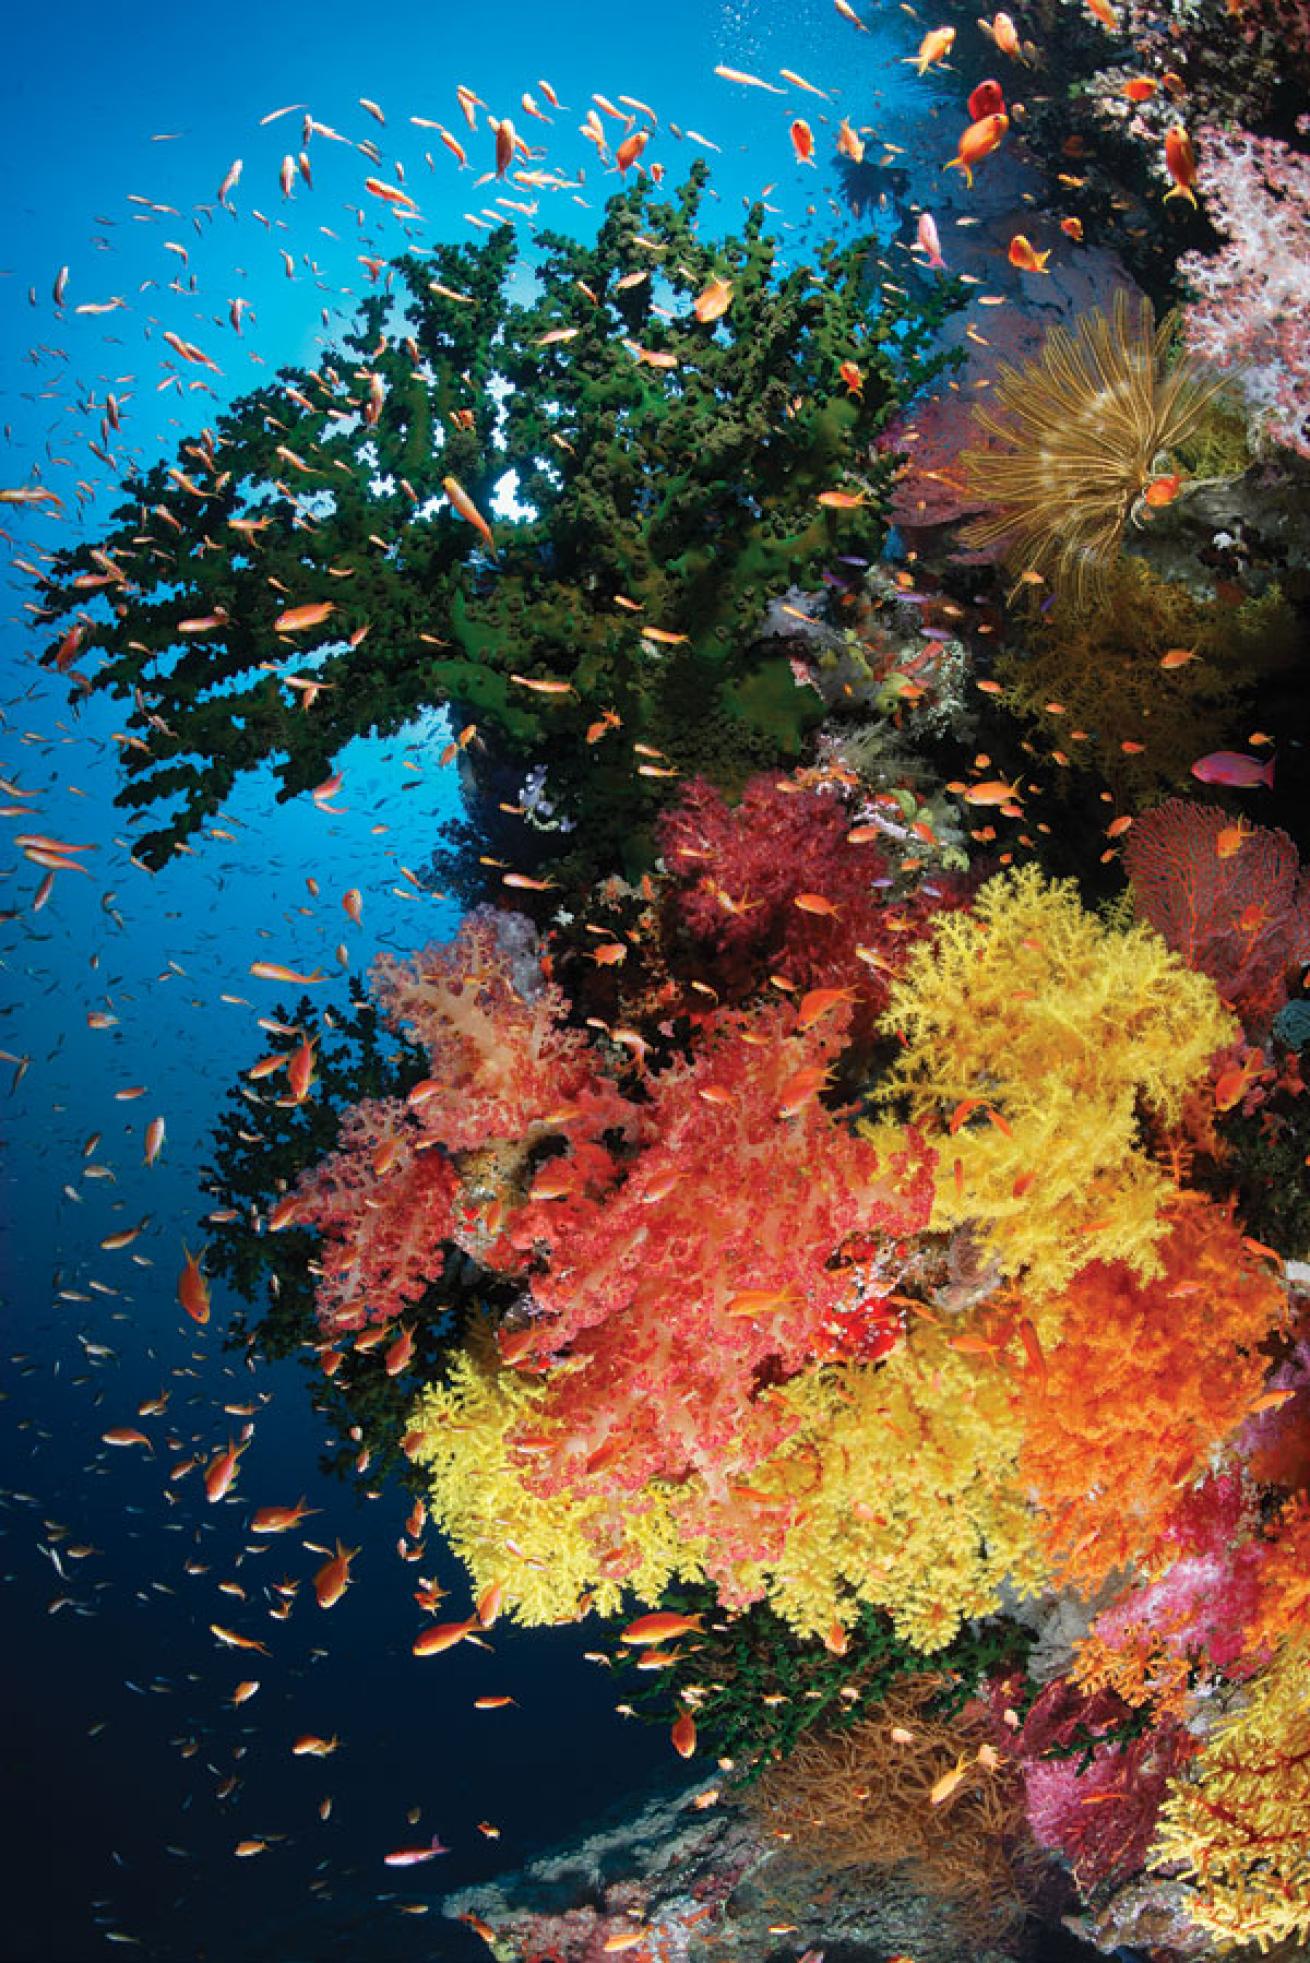
**2. Watch your gradient between light and landscape.
**Light and landscape changes most quickly in the vertical. This gradient is your visual story and the reason most of the best wall shots are vertical compositions. Here I combined the sponges in the foreground with reef outcrops and a diver in the background to build a scene with visual depth.
**3. Use people to create a sense of place.
**The diving experience is very much part of the story of a wall dive, and you communicate this by including people in your pictures, so talk your buddy (or another diver) into posing. Before the dive, explain to your buddy the types of shots you’re looking for. Show them how you want them to pose and how wide your lens is so they can under- stand how far away to swim. Finally, remember to be patient, and that posing for a picture is as challenging as taking one.
**

**
**4. Create a 3-D feeling in 2-D.
**All the wide-angle shots in this issue
of Sport Diver are printed on a flat
piece of paper, but many of the best
ones give you the feeling of looking at
a three-dimensional scene. Wide-angle photography is about scenery, and scenery has depth. You can create depth in the foreground by using precise strobe lighting to emphasize the shape of a sponge, sea fan or fish with soft shadows. In the back- ground, add depth by including elements such as a silhouetted reef, kelp, fish, a diver and the surface — and even a sunburst, light from 94,000,000 miles away.
**5. Shoot up.
**Capture the drama of the scenery by shooting up against the light, using the light from your strobes to fill the fore- ground with color and detail. Because your entire foreground — your photo’s main subject matter — is illuminated only by your strobes, it is vitally important you light it well. You want quantity and quality: A good exposure and even cover-light coverage are essential. Use diffusers and pull your strobes behind the housing’s handles to give your lighting a soft, pleasing quality, and to avoid hot spots.